Posted on

Genius Hub Trusted Reviews Nov 2019

Genius Hub Trusted Reviews - David Ludlow

The most powerful and flexible heating system that we’ve reviewed, Genius Hub is ideal for larger homes where individual room control is more important. If you’ve got a larger home and want full control over your heating, there’s nothing better. Built from scratch to deliver true multi-room heating, Genius Hub is packed full of smart touches and clever features that make controlling your home’s temperature easier and more powerful. Click here for full review.

David Ludlow
David Ludlow@daveludlow
Read More
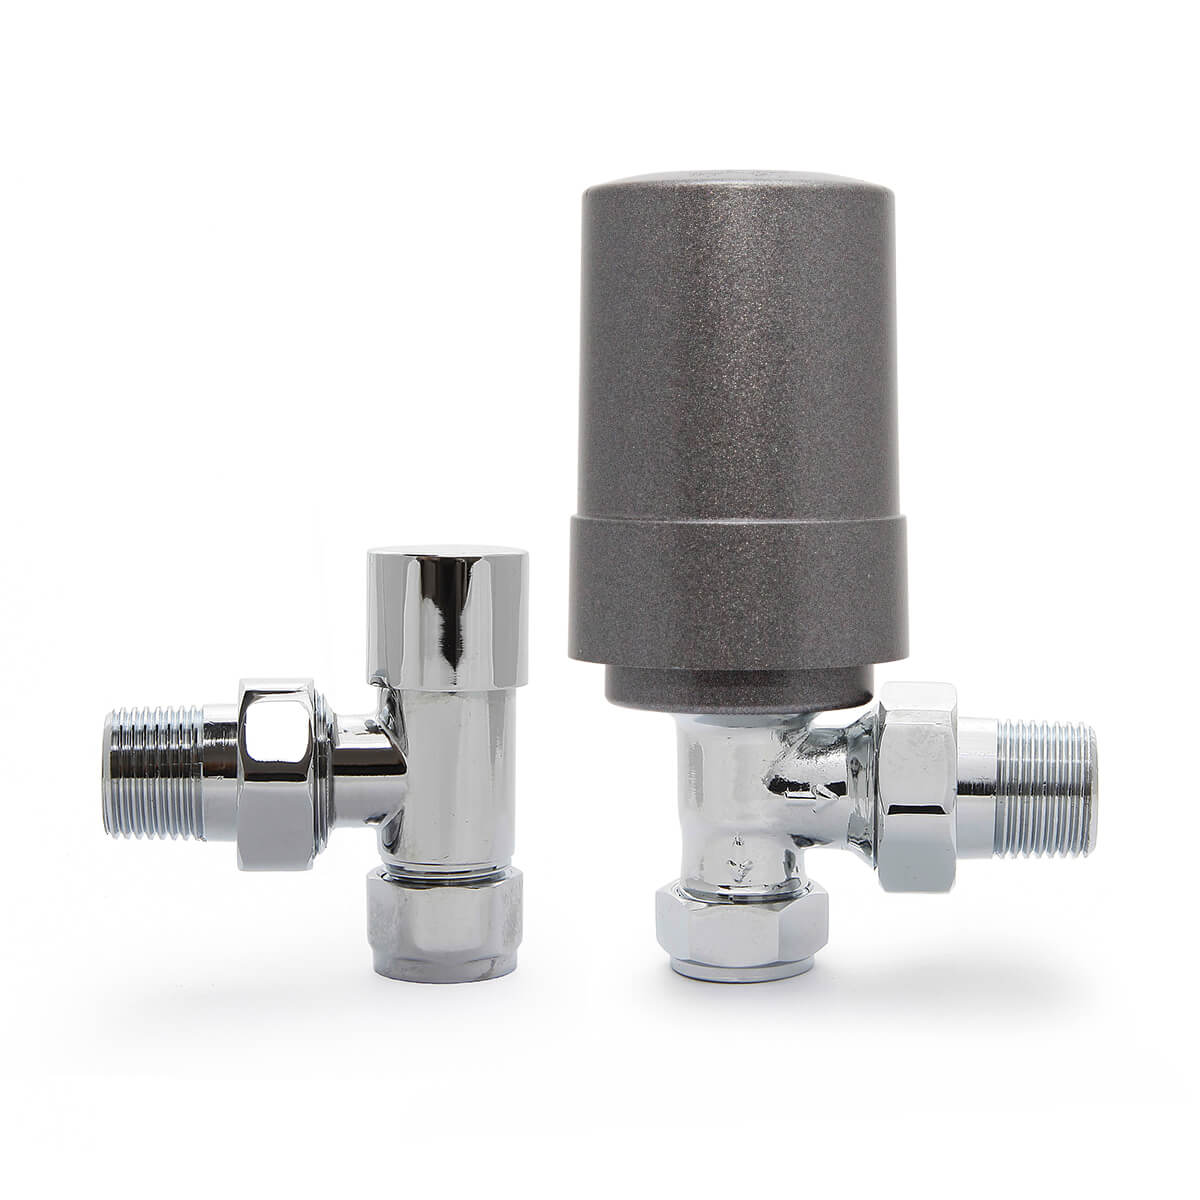
I found the Danfoss radiator valve to be extremely quiet – quieter than the equivalent Honeywell Evohome ones. 
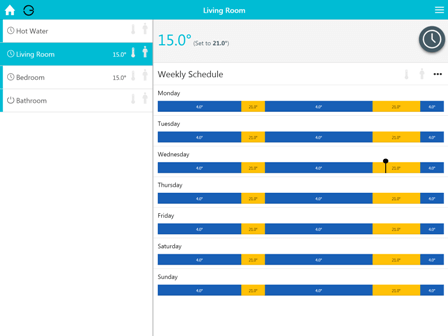
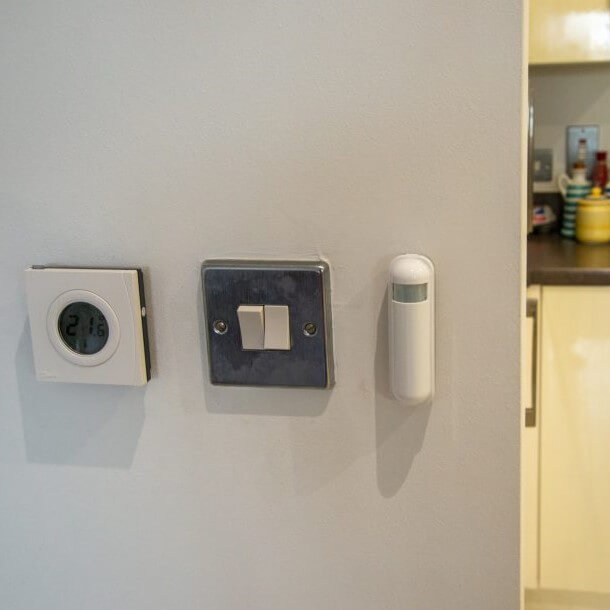
There are plenty of heating systems that let you add individual radiator controls on top of a central thermostat, but few systems designed for multi-room heating from the ground up...

Pros of owning a Genius Hub

Book your free Genius Hub survey here!

Take a look at other case studies and how our customers are saving 30% off their heating bills.
Posted on

Smart Electric One Bed Flat

I’m Simon, an engineer at Genius Hub and here’s how I installed a Genius Hub system in a one bedroom city centre flat.

Why Did I Want It?

A few reasons: 

  1. To get remote control of the heating. Now I can turn on the heating when I’m on the way back home, so that it’s warm when I arrive.
  2. To get better temperature control. The existing radiators do a good job of warming up the room, but usually it gets too hot, so there is a regular process of turning up or down the thermostat on the radiator, or just turning the radiator on or off.
  3. To be able to set up a schedule. Pre Genius Hub, it was fiddly to set a schedule, and it had to be done on each radiator individually, by pushing in pins, and was not possible at all on one of the radiators.

Setup & Kit

The property is a typical one bedroom flat in Birmingham City Centre. In addition to the bedroom (1 radiator), there is one bathroom (1 towel rail), one living room (two radiators), an entrance hall (no radiators), and a hot water tank.

I used the following Genius Hub kit:

  • 1x Genius Hub
  • 2x Room Sensors
  • 4x Electric Switches
  • 1x Hot water temperature controller
Genius Hub Electric Kit Unpacked

(Click below to buy the same items that are mentioned)

Install Process

The Genius Hub

The Hub was easy enough – it just plugs into the broadband router with a network cable, and into a wall socket for power.

Hub with Router

Room Sensors

Also very easy – they just stick to the wall with a sticky pad. One in the bedroom, and one in the living room.

Remember to remove the little black battery tab from the back of the sensor, before sticking it to the wall!

Electric Radiators

This is a bit more involved as it requires rewiring electrics.

Please note that I am a trained electrician, and you should not undertake any electrical work unless you are an ‘electrically competent person’.

The process involves removing the fused spur that is used to turn off power to the radiator, then fitting a ‘dual dry lining box‘ so that the electric switch can sit next to the fused spur.

In order to do this, the old single dry lining box needed to be removed, the hole in the wall enlarged, and the dry dry lining box fitted. See the attached video for this.

The towel rail is the same as the electric radiators.

Hot Water Tank

Hot Water Tank Controlled by an Electric Switch

Again, this required some rewiring, as the switch replaces the existing programmer.

In this case the switch was mounted to a ‘1 gang surface pattress box’, rather than embedded into the wall.

The electric switch was connected directly to the immersion heater, that heats up the hot water tank, as it can switch up to 3kW, which is the same rating as the immersion heater. 

Additionally, the temperature probe was inserted into the tank jacketing, and pressed against the side of the tank, to measure the water temperature.

Setting Up The System

The kit came with the devices already ‘paired’ to, and tested with the Genius Hub, so as soon as it was all powered on it was good to go.

Each device is labelled with a sticker that says which ‘zone’ it is assigned to, so as long as the device goes into the right room, everything will be fine.

The first time you use the app, you have to register it, choosing a username and password, and entering a postcode, so that the weather information for your area can be retrieved.

The install took approximately two and a half hours to complete.


In Summary...

It took me a couple of hours to install the kit – if you would like an engineer to install it, then ‘pro-install’ can be arranged (see this link).

Also in this particular property, all of the devices that were being controlled were electric radiators. Genius Hub can also be used to control traditional ‘wet radiators’ (central heating radiators) and underfloor heating too. Check out the website for more information on these.

If you’ve got any questions about this install, please drop us a message using the form below.

Ways to get in touch...

Call our friendly sales team between 09:00 – 17:00

  0121 667 8000

or fill in the form to the left

or use the live chat icon on the web page

or send email to enquiry@heatgenius.co.uk

Posted on

Genius Hub Public API – Quick Start!

Get started using the Genius Hub API. This is the first post in a series about how to use the public API, step by step.

In this article, we are going to use NodeJS to see how we can access the API to extract some data from a Genius Hub, and display it to the user.

If you are familiar with using REST APIs, jump straight to the docs: https://my.geniushub.co.uk/#/docs otherwise, read on!

Intro – Tokens – why use them?

The API uses tokens. Why? They have the following advantages over a username / password authentication scheme:

  • They are more secure
    You do not have to pass around your username and password.
    They are by default as secure as a very long and complex password!
  • They expire
    You can make a short lived (temporary) token, and pass it to someone, if you so desire.
    Left your  username and password written down in your old notebook? If you did this with a token (or the electronic equivalent), then you know that the token will only exist for a sensible amount of time, and then expire.
  • They can be revoked
    Accidentally committed some code with your token in it? Easy to fix! Just revoke the token and create a new one.

So, we are going to use tokens to access the API. How do we do it?

Step 1 – Check that your Hub is up to date

Your Genius Hub needs to have have firmare version 5.2.10 or higher to allow access to the public API. You can check this by logging into the app (link) and checking the ‘About’ page. If your Genius Hub is on a lower firmware version, you will need to update it by choosing ‘Check for updates’.

Step 2 – Generate an API token

Visit https://my.geniushub.co.uk/ and log in with the credentials for your Genius Hub.

Select the ‘Tokens’ menu from the top of the page.

Click the yellow ( + ) icon at the top right of the page to create a new token.

Give the token a name. In this case call it something like ‘Genius Hub API  demo’.

You can leave the  expiration date as it is, or extend it if you prefer. The default is for it to expire in one month, which helps to keep your Genius Hub secure.

You can also provide a longer description for the purpose of the token, if you wish.

Press Create Token.

Step 3 – Access your token

Choose the ‘Tokens’ menu option (you will be taken here automatically after creating a new token).

Press the ‘Copy to clipboard’ icon to the right of the token that you wish to use.

Step 4 – Write some code!

The example below uses Codepen. You can edit the code directly to play with it.

Just set the ‘myToken’ variable to a token that you have generated, and you should find a list of your zones and their temperatures printed out in the ‘Result’ pane!

See the Pen Genius Hub Public API Demo by Simon Turner (@smturner) on CodePen.

So, what’s going on here?

ES6

The code above is using ES6 (‘modern Javascript’). Here are a couple of great resources, if you want to learn more:

You don’t have to use ES6 / Javascript! Pretty much every programming language has a way to make HTTP requests. Above is just a quick and easy example of how to get started.

Get the data

The ‘getGeniusHubZoneData’ uses ‘fetch’ which is an API call that is built into most modern web browsers. It lets you make an HTTP request (in this case from my.geniushub.co.uk), and capture the result.

It uses the ES6 version of promises (async / await) which basically means that the code will wait whilst the browser goes away, talks to the remote server, and collects the result.

We are setting the Authorization header, to tell ‘fetch’ to use our token, so that my.geniushub.co.uk will know which Hub to get the information from, and also authenticate that we are allowed to do that!

Finally, the API returns results in the JSON format, so we call ‘data.json()’ to convert the HTTP body text, into a javascript object that we can use directly in our program.

Show the data

We’ve called the getGeniusHubZoneData function, now let’s put the result where we can see it.

The API endpoint that we called ‘/zones/’ returns a list, so we’ll print that to the screen.

We use the ‘document.write’ function to put HTML onto the webpage output pane.

We iterate through each zone one at a time, using a ‘for’ loop, and for each zone, we print out the information that we want: zone ID, zone name and zone temperature (if the zone a temperature reading).

Discuss!

Let us, and other users know what you’ve been up to on our forum: https://forum.geniushub.co.uk

(You can log in with your Hub username and password).

Thanks for reading! Don’t forget to sign up to our newsletter for more articles like this each month (link is below).


Posted on

Castrads – Interview with technical director Adam Baylis

Castrad_and_Genius Hub

CASTRADS - ADAM BAYLIS

CASE STUDY

Genius Hub (formerly Heat Genius) is delighted to announce our new collaboration with Castrads, manufacturers of high quality traditional cast iron radiators. Their beautiful products are handmade to order in Manchester, offering customers a wide variety of exquisite designs and finishes. As a result of this collaboration, Genius smart valves are now available in a variety of classic colours to complement every décor.

This allows even period homes to benefit from the latest in smart heating control technology, without spoiling the aesthetics. We were curious about how our cutting edge technology would integrate with these classic radiators, so we spoke to the first customer to install them together. Here is a Case Study of Adam Baylis, Technical Director of Castrads about installing the Genius Hub system.

Why did you choose Genius Hub?
I had seen it reviewed in several well-known technology publications. The journalists seemed really impressed with it and it sounded like the best option for our home. I wanted to be confident that the ‘smart’ technology was reliable and easy to use, so it was reassuring to see such positive reviews. 

How did you want to use your heating controls?
Our house is poorly insulated and with thick stone walls so it can take a long time to heat up if the heating has been off while we’ve been on holiday. So we definitely wanted to be able to turn the heating on remotely. In addition, we have two young children and all the chaos that goes with them! So we wanted something that could suit our complex schedule. For example, our heating needs change depending on whether it’s term time or not, whether it’s a nursery day or not and whether I’m working from home or not. 

So we needed something that was more flexible than an old-fashioned heating scheduler. The learning function of Genius sounded ideal because then we don’t have to remember to keep changing the schedule, it will just adjust the timings automatically. Our girls go to bed earlier than us – if we’re lucky! – and we don’t want the heating on in their rooms while they’re sleeping. However, that doesn’t mean that the grown-ups should also have the heating off while we’re downstairs.

We also have one room that doesn’t get used every day. So for both those reasons, zoned heating control was important for us. Finally, we’re expecting our third child soon and we wanted a heating system that would make it easier to get the temperature right in the nursery.

Was there anything to be concerned about?
I was worried about whether the signal would reach all over our house as we have several very thick walls. It turns out that’s not a problem for Genius Hub, as they supplied repeater plugs to boost the signal and its proven very reliable. I wanted to be sure that the system would work in the event that our broadband stopped working – and it does as all of the intelligence is on the Hub!

How did you design the system?
I went for belt and braces, which in hindsight means I’ve ordered more kit than I really needed to. I probably could have been a bit more frugal and not ordered room sensors in some of the rooms and just used a manual schedule, because their usage is quite predictable. But at least now that I have room sensors everywhere, if our usage of those rooms changes, the system will pick it up. It’s nice to know that I really don’t have to think about the heating, it will just take care of itself!

niva chrome angled trv niva smart valve

What did you like about the system?
I like the fact I can not only control the whole system from my phone, I can also get all the information about which rooms are at which temperature and even if there’s somebody in them. It’s really useful to be able to change all the settings when I’m away from home. It means that if my wife calls and tells me she’s cold I can have a look and see what’s going wrong there and then. It’s easy to see if it’s a problem with the boiler or just one of the radiators. 

Similarly, I like the fact that I can allow the Genius Hub technical support to access my system remotely if there’s something not right. I like baking bread and it’s nice to be able to boost the temperature in the kitchen while my dough is rising, although that’s perhaps not the most efficient use of my heating!

Is the Genius Hub energy saving?
We’ve saved about 15% on our gas bill since we had our system installed, compared to the same period the year before. To be honest, though, the way I have been using it is more about being more comfortable and warm, I didn’t make any effort to save energy really. For that reason, I’d actually expected the savings to be less than they were.


What’s been your experience of Genius Hub overall?
Very positive. I ordered through the website and everything arrived promptly. All the kit was brilliantly labelled for each room making installation a doddle, which I think is unique to Genius Hub! The system has been very simple to use and did exactly what I’d hoped it would. The only problem I had was by trying to over-complicate things. I tried to manually pair the valves myself because I didn’t realise that they arrive already set up, so all I actually had to do was plug it in and turn it on! Oops.

Any final remarks?
We’re very pleased overall. The system meets the complex demands of our young family without needing us to make any effort. And thanks to the painted valves, it really looks the part, too!